Introduction
Tutorials
Improving a discharge simulation
A reservoir drawdown simulation calculates a family of output simulations for a well at different reservoir pressures. This is used to predict the output of the well as the reservoir pressure changes.
This tutorial shows you how to run a typical reservoir drawdown simulation for a well. It uses data for well RK5 in the Sample database.
A reservoir drawdown simulation is the same as an output simulation - see here - except that:
WellSim stores output simulations and reservoir drawdown simulations in the same part of the database. Therefore, an output simulation can not have the same ID number as a reservoir drawdown simulation.
In the sample database, open a new reservoir drawdown for  .
.
Enter this data; note reservoir pressures are bara:
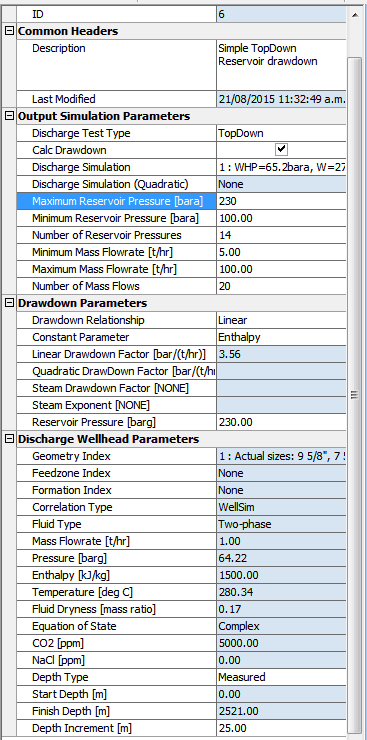
Note how you have specified a range of reservoir pressures to use and the number of reservoir pressures to use.
Click  to check and, if necessary, adjust the data. Correct any errors and repeat.
Click  to run the simulation. You are likely to get many error messages, corresponding to combinations of reservoir pressure and mass flowrate that are physically impossible. You can usually ignore these errors because there will be enough valid results.
The graph is confusing, because there is one curve for all reservoir pressures, for example:
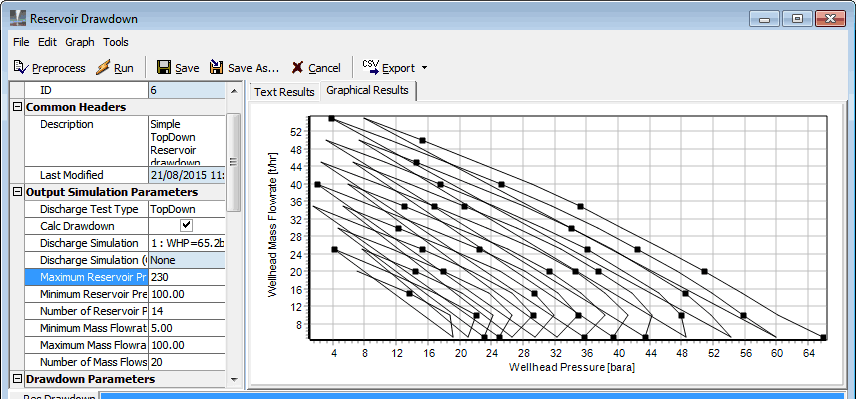
We will now view the graph in Multiple Graph.
Click  to save the reservoir drawdown and return to the reservoir drawdown window.
Tag the reservoir drawdown you just created and click  . The graph is now clear:
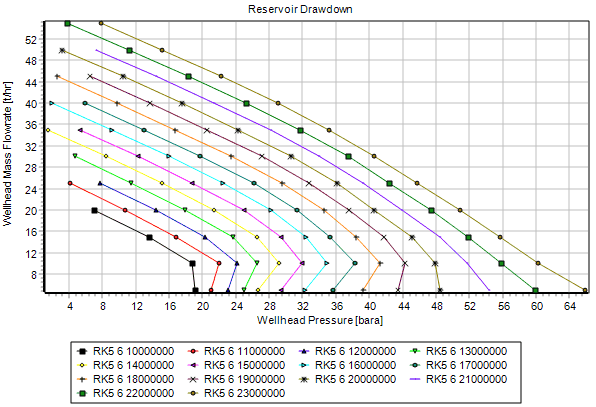
The reason it is clear is because the data is now grouped by Reservoir pressure, so the results for each reservoir are a different dataset. Each dataset group is coloured white or green alternating:
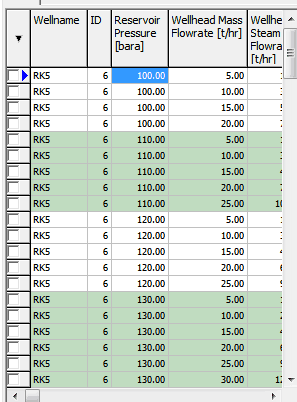
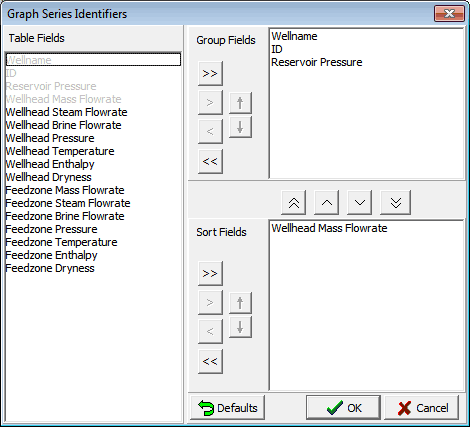
The deafult grouping to cause this has Reservoir pressure as a group field:
This part of the tutorial shows how to manually model the effect of changes in reservoir pressure on output. You can use this to duplicate a reservoir drawdown, or can create a manual reservoir drawdown where the reservoir pressures are not equally spaced. For more on using WellSim to model what-if scenarios like this see here.
This tutorial uses the output simulation From better BU 100 t/hr that you should have entered earlier.
This follows the basic steps for a BottomUp what-if scenario described here.
Here you will create several BottomUp output simulations, each at a different reservoir pressure and with the same BottomUp discharge simulation, then use multiple graph to compare them.
You will make copies of existing simulations, change them as necesssary and run them. This avoids having to write down and reenter data.
The change required for this what-if scenario is to use different reservoir pressures in each output simulation. For this what-if scenario we are not changing any data that is in a discharge simulation, therefore we can use an existing BottomUp discharge simulation for the new BottomUp output simulations.
Create a copy of the output simulation From better BU 100 t/hr and open the copy for editing.
Change:
BU 175 barg reservoir175 bargCalc Drawdown so we can specify a linear drawdown factor; the default, 0.118 bar/t/hr is correct, so there is no need to enter itThe other default values are correct, because we are not modelling other changes.
Run and save this new output simulation.
Repeat the above steps to create and run three more output simulations for 150, 125 and 100 barg reservoir pressure. For each enter the appropriate description (for example BU 150 barg reservoir) and reservoir pressure and untick Calc Drawdown.
Note that the output curve for 100 barg does not reach 300 t/hr.
In MY WELL's Output simulations window, tag  :
:
the four new output simulations at different reservoir pressures
a TopDown output simulation (uses actual reservoir pressure), such as From better TD 100 t/hr.
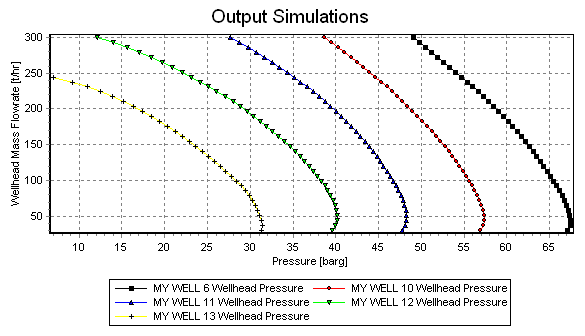
Click  to see the family of output curves:
