Introduction
Tutorials
Getting familiar with GeoData Manager
Changing how GeoData Manager looks
Scenarios for using GeoData Manager
Data types and nodes
Help with data types and nodes
Getting familiar with GeoData Manager
Changing how GeoData Manager looks
Scenarios for using GeoData Manager
Help with data types and nodes
Work with the core register is in the nodes Geology: Core Register - by Well and Geology: Core Register - by Section read more.
This example assumes you have received these cores and cuttings from well AT-301:
| Depth [m] | Category |
|---|---|
| 50 to 500 | Cuttings |
| 500 to 501 | A 1 m core |
| 501 to 502 | A 1 m core |
| 502 to 505 | Three 1 m cores, now missing |
| 505 to 1000 | Cuttings |
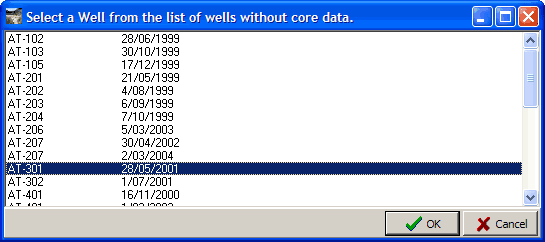
Go to node Geology > Core Register - by Well and invoke New.
There can only be one core register for each well. GeoData Manager displays a list of wells that don't have core registers. Select one:
Enter a Sidewall core mode:
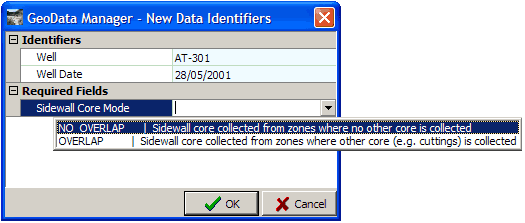
NO OVERLAP if all sidewall cores don't overlap any other cores or cuttings; or if you don't have any sidewall cores.
OVERLAP if some sidewall cores overlap other cores or cuttings.
Click OK.
Enter data for the cores and cuttings you are assumed to have:
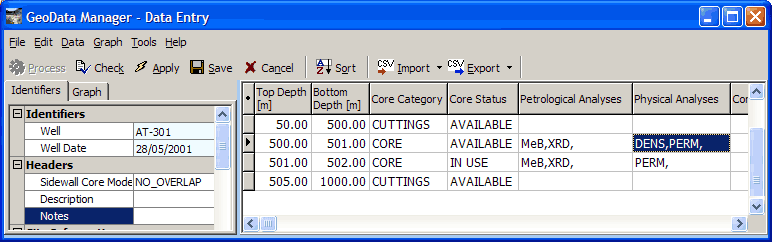
For Petrological and Physical Analyses, select test names from the drop down list. GeoData Manager automatically orders them alphabetically. You can change the Analysis names in the drop down lists at node Lookups: Geology.
Click Check. Geodata Manager gives some errors, because there is not core register data for the whole depth of the well. Enter data for the rest of the well as MISSING:
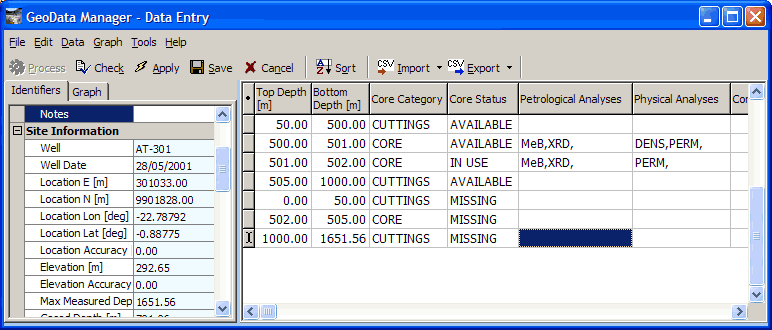
Click Check again to confirm there are no errors. Click Save.
The names of any Petrographic and Physical analyses are stored as alphanumeric values (text). You can therefore filter them using wildcards read more.
This example shows a Process that uses the well lithology data and the core register to find cores that should contain a given rock type.
In the sample database, go to the node Geology: Well Lithology. This has details of rock types at different depths.
In the filter bar:
Click  and click
 Default Filter in case the filter was different.
Click the  beside
 Geology Data ID and click DETAILED in the list.
Click Tag All:

Click Process/3D:
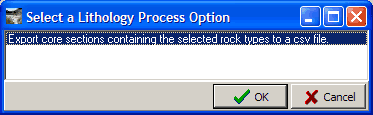
Select Export core sections containing the selected rock types to a csv file. Now answer some questions ...
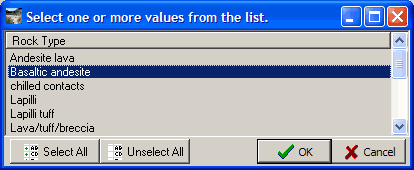
Rock type to look for ? select Basaltic andesite:
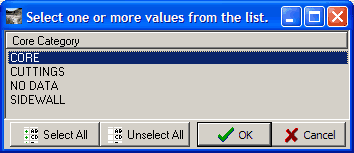
Core category to use ? select CORE:
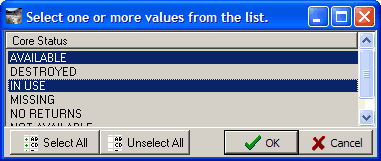
Core status to use ? select AVAILABLE and IN USE (Ctrl+click to select more than one item):
The result is a csv file: select a folder and a file name and click OK. Here is the file, opened in a spreadsheet:

There is one core that contains Basaltic andesite. The core is seven metres long, from between 1493 and 1500 m deep. There is a layer of Basaltic andesite between 1499.39 and 1509.14 m deep. Therefore the bottom 0.61 m of the core should be Basaltic andesite. You can look in the core register to find where that core is now.